Download and Setup ESP-IDF
This tutorial is for downloading and setting up the ESP-IDF with the windows operating system.
Important Links
Steps for Linux and Mac
Steps
- Get the toolchain
- Get the ESP-IDF Core Packages
- Compiling and running a sample program
Getting the Toolchain
Download the Toolchain from here
If link is broken, please do go to Get Toolchain for Windows in the Important Links above
- Unzip this to a folder of your choice, default taken as:
C:\ - Pin the
C:\mysys32\mingw32.exeterminal program to your taskbar, since we will need to use this rather frequently to compile, flash and monitor the programs
Getting the ESP-IDF Core Packages
1
git clone --recursive https://github.com/espressif/esp-idf.git
Make sure you use the --recursive option, we need to get all the submodules
- Run the above command in a folder of your choice ex:
D:\GIT\esp-idf - This is used to set up the
IDF_PATHfor your Core Packages
Setup IDF_PATH Variable to your user profile (Windows)
Steps for Windows, Mac and Linux are different, so do check the above link
User Scripts are contained in C:\msys32\etc\profile.d\ directory.
- Create a new script file in
C:\msys32\etc\profile.d\and name itexport_idf_path.sh. - Find your ESP-IDF directory, ex:
D:\GIT\esp-idf - Add the
exportcommand to the script file1 2
# Forward slashes are important (Don`t add this comment to file) export IDF_PATH="D:/GIT/esp-idf"
- Save the script
- Check if
IDF_PATHexists by typing1
printenv IDF_PATH
Make sure use forward slash in the script file instead of backslash, which is common in windows
Compiling and Running a sample program
For Users that have downloaded the esp-idf repository after following the above steps, navigation to the get-started -> blink example
Steps
- Copy the entire blink example to another folder (of your choice) ex:
D:\esp32Programs\Tutorials - Open your
MYSYS2 MINGW32 Shelland navigate to that path (Example given below) - Run
make menuconfigto open menu tree and configure ESP-IDF - Run
maketo compile - Run
make flashto flash compiled version to your hardware - Run
make monitorto view monitor output on your console
Navigate to Path
1
2
3
4
5
6
7
8
9
# Example
cd D:
cd esp32Programs
cd Tutorials
cd blink

# We have navigated to the directory
# NOTE, Type ls to see your output
ls
You will see output like this

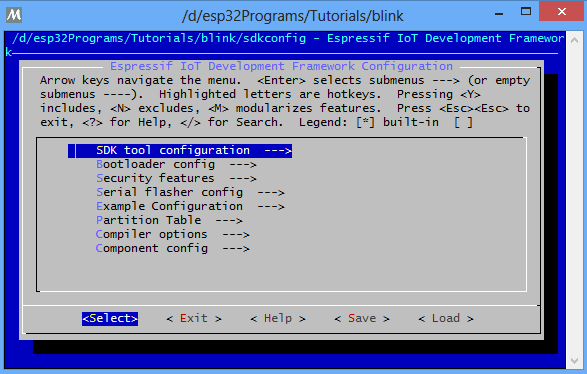
Open ESP-IDF menuconfig
1
make menuconfig
Set the COM Port of your device
Find your device COM Port

Navigate to Serial Flasher Config (to set the COM port of your device)
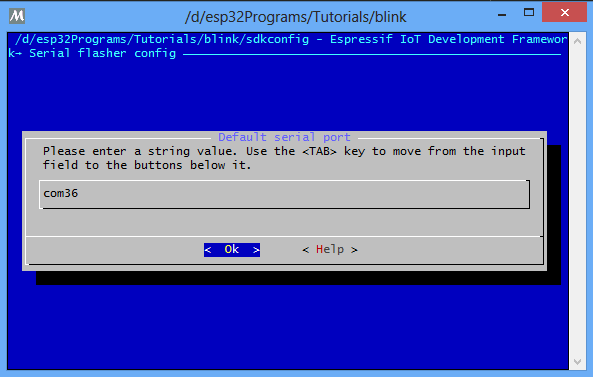
NOTE: For linux or mac your COM Port might be /dev/ttyUSB0
Set the example Configuration number (OPTIONAL)
Change Example Configuration number here (D2)
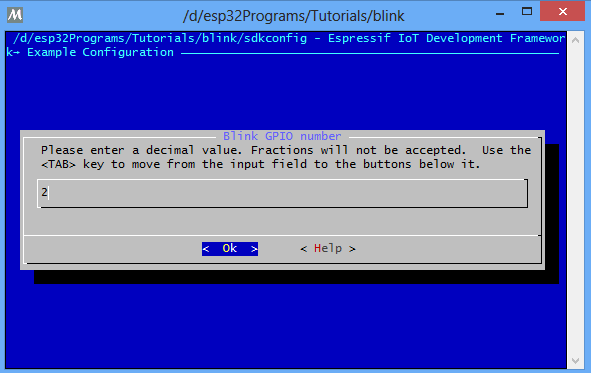
For most devices in ESP32 the internal LED is attached to pin D2 which is pin number 2
Users wishing to test on different pins can change this pin number
See the source code (main.c looks like this)
We can also change CONFIG_BLINK_GPIO (which is set inside sdkconfig.h) to the appropriate pin number instead of changing it through make menuconfig
1
2
3
4
5
#include "sdkconfig.h"
// The variable CONFIG_BLINK_GPIO has been set through sdkconfig
#define BLINK_GPIO CONFIG_BLINK_GPIO
// OR, change to
#define BLINK_GPIO 2 // (D2), Internal LED Attached to Pin D2
Make the project
make
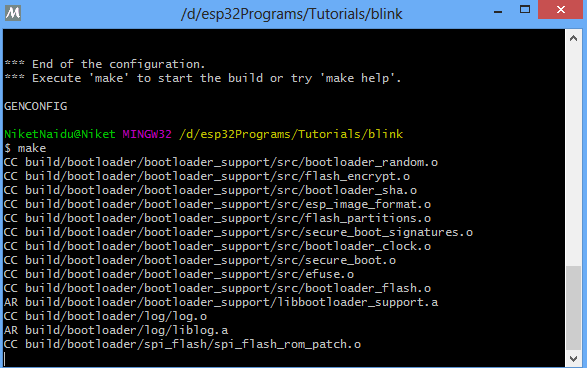
Please note that it can take a significant amount of time to compile all the libraries when running your first make command.
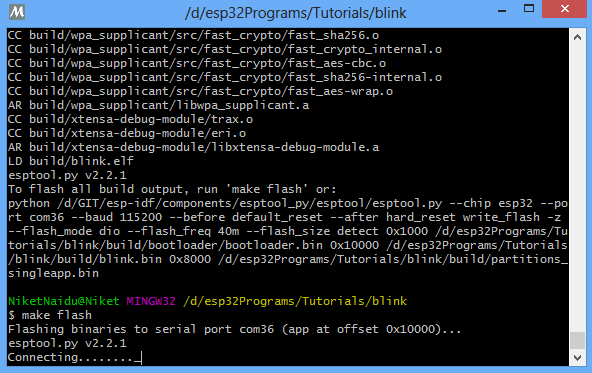
Make flash the image
Start the make flash command and you should see it connecting to your device
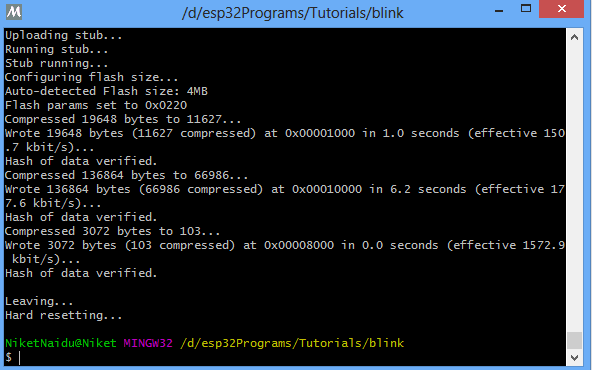
When make flash is completed, this will be your output
Conclusion
After all these steps, you should see your ESP32 internal LED blinking at a constant rate of once per second.
This tutorial has been about setting up your ESP-IDF with your computer system so the code example has not been explained.
In the next tutorial, I plan to show you how to integrate the ESP-IDF environment with the ECLIPSE IDE for faster prototyping

Comments