Setup Eclipse CDT with ESP-IDF
Integrate your ESP-IDF framework with the Eclipse CDT IDE for faster prototyping
Required
This is the Eclipse C/C++ IDE
Configuration Details needed for syncing your ESP-IDF with Eclipse.
Copy this file and add your own configuration details
Docs
ESP-IDF with Eclipse for all OS’es
ESP-IDF with Eclipse for Windows
Setup
We take the example program and make menuconfig
- Set
Serial flasher config=>Default serial port- Set your COM Port here
- We will not be using
Example Configuration Component config=>FreeRTOSRun FreeRTOS on first core(YES)
Why are we setting these parameters
- Your COM Port is what is required to flash and communicate with your hardware
- We run FreeRTOS on First core since the ESP32 has 2 cores. Since we are learning we want a predictable behaviour which we can check
These parameters are set so that we do not need to keep running make menuconfig
I will be storing this parameters and adding this project to the ConfigProject folder here
For every next project, just take this pre-configured project and copy it to a folder of your choosing, porting it to eclipse then becomes very easy
After running make menuconfig
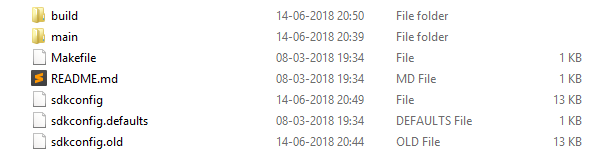
Only run make menuconfig, do NOT run make after that.
Reason is that, make builds the entire libraries inside the build folder. However, when we port this application to Eclipse, it will not be able to find the packages. Make sure that the build folder is cleaned by running make clean
Adding the Project to Eclipse CDT
Integrate ESP-IDF with Eclipse
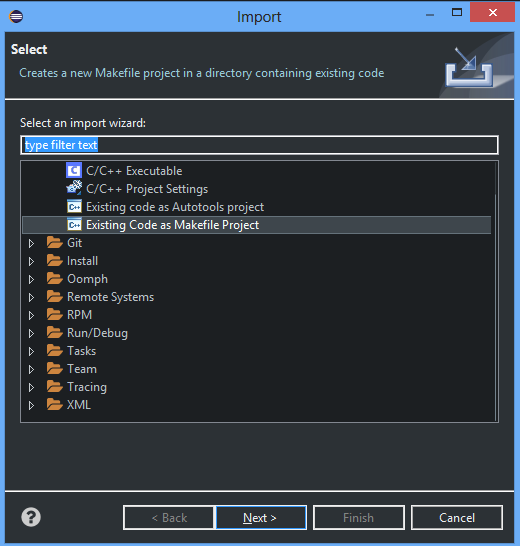
Import Screen
Import Project as a Makefile, since we will be using make build and make flash commands
Import Toolchain
Import the Cygwin GCC Toolchain since the ESP-IDF MYSY2 configuration most closely resembles that.
Do not worry, we will configure the appropriate paths later in this tutorial.

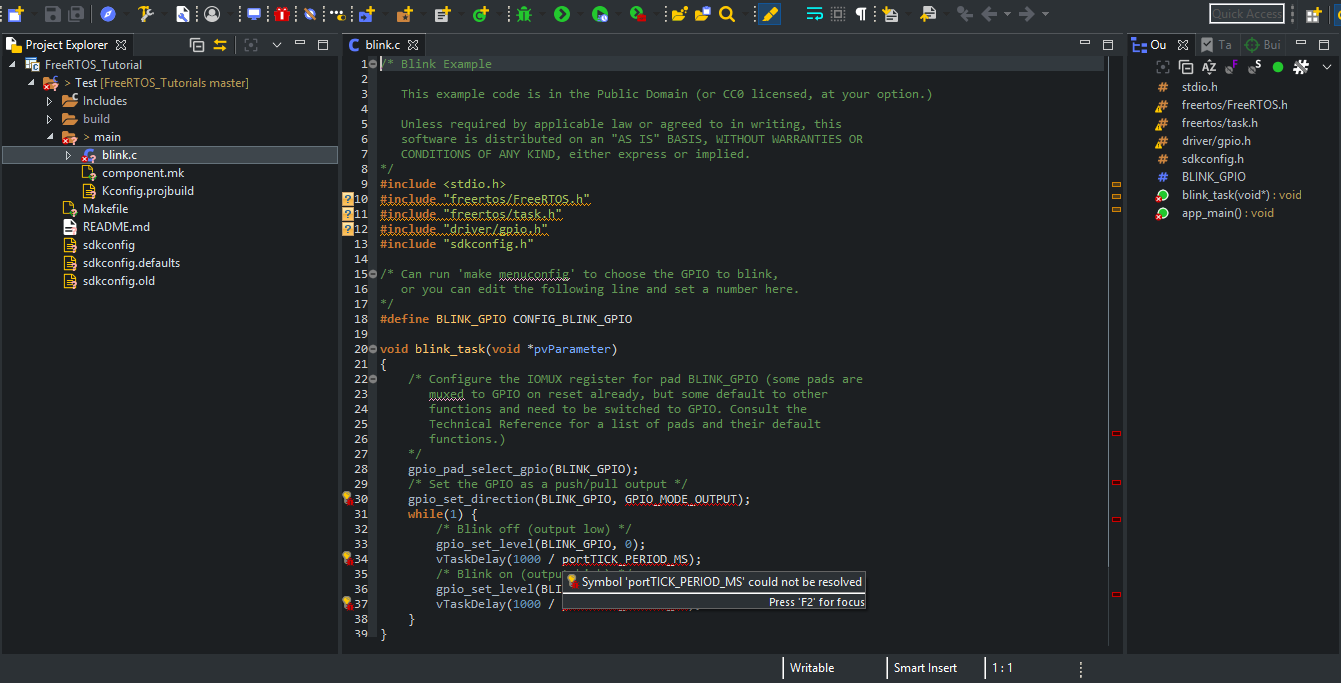
Initial Screen
This is the initial screen. As you can see, the default settings cannot find your ESP-IDF packages and build tools.
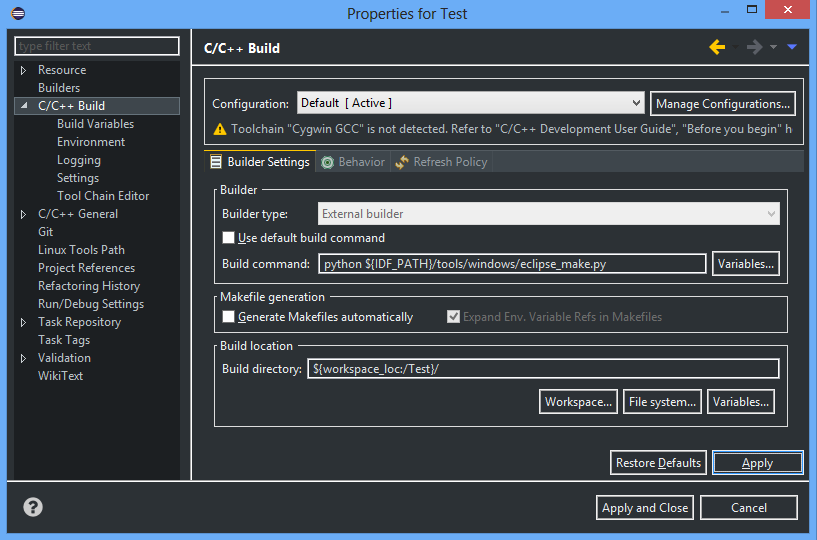
Settings (Added once every project)
These settings need to be added to successfully link your libraries and tools to your project
Top Level => Build Command
Add python ${IDF_PATH}/tools/windows/eclipse_make.py
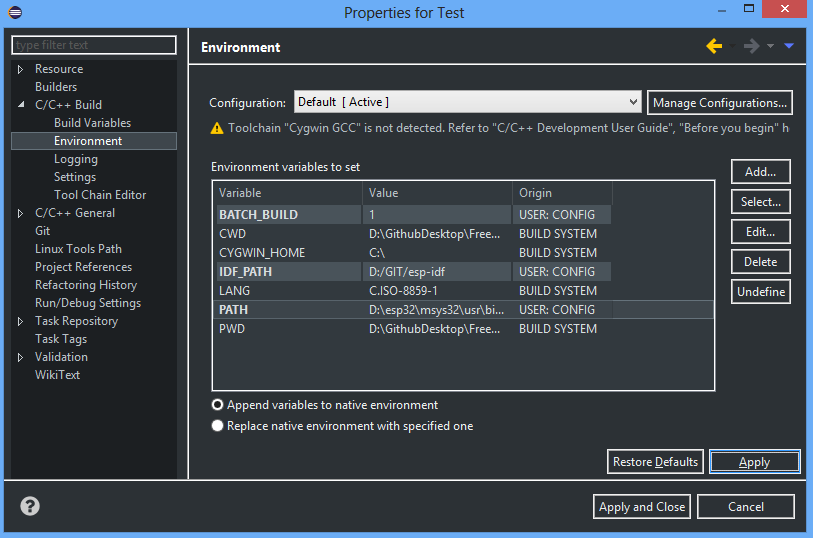
Environment Tab
Setting your environment variables
-
BATCH_BUILD =>
1 -
IDF_PATH =>
D:/GIT/esp-idf
Note: Make sure the IDF_PATH has Forward Slashes instead of backward slashes
-
PATH (Override Default)
D:\esp32\msys32\usr\bin;D:\esp32\msys32\mingw32\bin;D:\esp32\msys32\opt\xtensa-esp32-elf\bin
If you installed msys32 to a different directory then you’ll need to change these PATHS to match
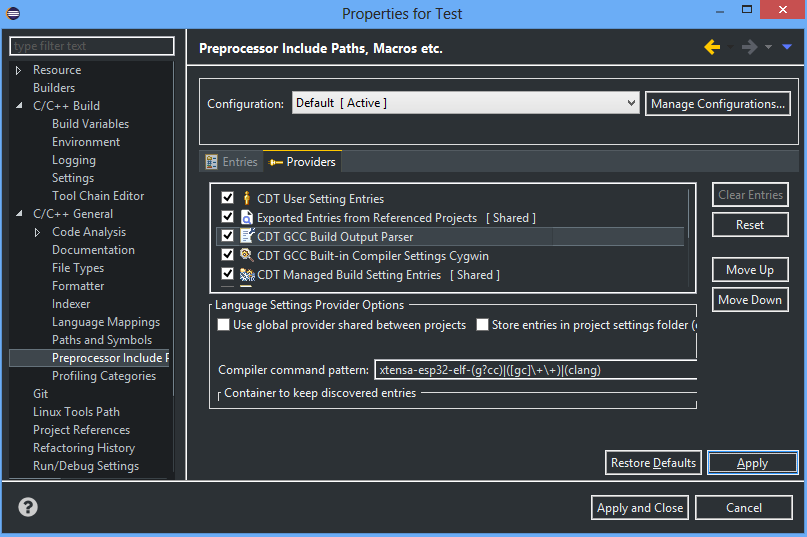
Pre-Processor Includes
Setting up your compilation tools
-
CDT GCC Build Output Parser
xtensa-esp32-elf-(g?cc)|([gc]\+\+)|(clang) -
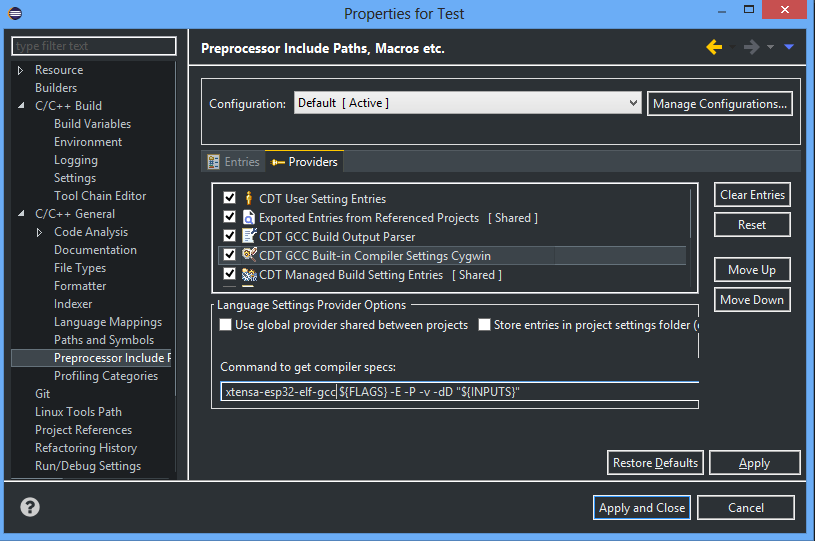
CDT GCC Built-in Compiler Settings Cygwin
xtensa-esp32-elf-gcc ${FLAGS} -E -P -v -dD "${INPUTS}"
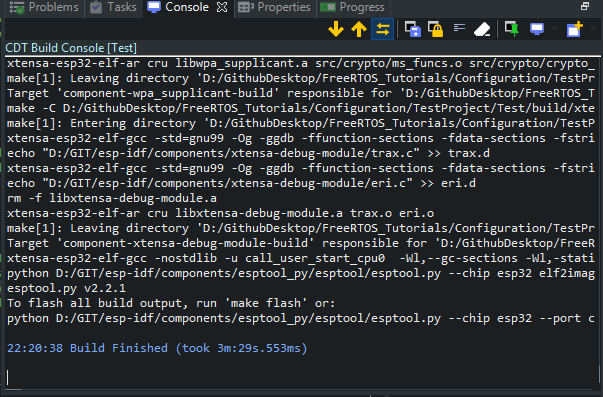
Build
Build the project by either Ctrl + B or right click on project and click build project option
If project does not build one main issue might be that your BUILD folder already has the binaries compiled.
To successfully compile right click on project and click clean project option. Build the project after this step and it should successfully compile
Flash
Right Click project and go to build targets => create
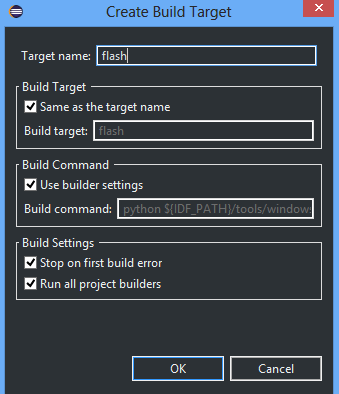
Once the flash target has been created double click and you should see your binaries getting flashed to your ESP32
Code
The entire Test Code has been added to my FreeRTOS_Tutorials Repository here
You can follow the steps from the start (make menuconfig) and setup your environment following the step by step instructions given above.
Conclusion
While this method does have a few configuration steps to go through for every new project setup, the 5 minutes that you will spend setting up your project will greatly help you in your prototyping speed.
Working with IDE’s give you access to code completion and error highlighting which also reduces debugging time
In the next tutorial, I will start with Tasks, which is the most fundamental FreeRTOS concept to familiarize yourself with.

Comments